If you have diastasis recti, you’re probably stuck between two bad options.
Either you’re afraid to exercise because you don’t want to make things worse—or you’re exercising, but constantly concerned you’re doing damage without realizing it.
That uncertainty is the real problem.
Diastasis recti recovery isn’t about doing nothing, and it isn’t about pushing through. It’s about rebuilding basic core control first, then progressing carefully as your body allows.
This article shows you how to do that—what to start with, what to avoid, and how to know when you’re ready to move on.
Key Takeaways
- Diastasis recti recovery isn’t about avoiding exercise or pushing through discomfort. It’s about rebuilding basic core strength first, then progressing slowly as your body allows.
- Early on, avoid anything that makes you strain, crunch your abs, hold your breath, or push your belly outward, including sit-ups, planks, and even sitting straight up from lying down.
- Start with breathing work, pelvic floor training, and gentle core exercises that train the deep muscles of your core without increasing pressure on your abs.
- Everyday habits matter. Improving posture and learning how to get up and lie down without straining your abs can reduce stress on healing tissue.
- Progress only when exercises feel controlled and comfortable and check with a doctor or specialist if you feel unsure about anything.
Table of Contents
+
Diastasis Recti Exercises: Start Here (Safety + What to Avoid First)
If you’re dealing with diastasis recti, you’re probably thinking two things:
- “How do I close the gap in my abs as quickly as possible?” and
- “How do I get my strength back without making this worse?”
The good news is that research shows diastasis recti exercises can help you minimize the gap and improve strength, functionality, and postpartum body satisfaction—but only if you start the right way.
Because early on, your main job isn’t to “sculpt six-pack abs.” It’s to avoid doing anything that increases intra-abdominal pressure (pressure inside your belly) enough to strain the connective tissue that’s trying to heal.
To do that, follow these three simple rules.
Rule #1: Don’t do anything that makes you “crunch” your abs
Early on, avoid movements where you strain or crunch your torso—especially anything that feels like you’re contracting your abs hard.
That includes the obvious stuff (traditional sit-ups and crunches), but it also includes everyday movements that new moms often don’t think about—like getting up and lying down.
How to Get Up and Lie Down Without Straining Your Abs
Learning the right way to get up and lie down takes pressure off your abs and helps you rebuild core strength and control without pain or bulging. Here’s how to get up:
- While lying on your back, gently brace your abs as if you’re drawing them inward.
- Roll onto your left side, placing your left arm on the floor with your palm down. Bring your right arm across your body and place your right hand on the floor in front of your chest.
- Keeping your core lightly engaged, press through your right hand to push yourself up into a seated position, with your legs to your right.
- Once upright, pause briefly to steady yourself. Use your hands for support if needed.
To lie down, do the same in reverse:

- Start seated with your legs to your left.
- Gently brace your abs, then place your right hand on the floor in front of your left shoulder.
- Slowly lower yourself onto your left side by bending your right arm and supporting your weight with your hand and forearm.
- Once you’re on your side, roll onto your back.
Rule #2: Train your deep core muscles first
To regain your pre-baby strength, you need to train the muscles deep within your core—especially your transverse abdominis and pelvic floor.
To do this, use simple, controlled drills like breathing, pelvic floor work, and gentle core-strengthening exercises that teach you how to brace properly again without straining the midline of your abs (more on the specifics soon).
Rule #3: Be patient
Many women want to jump back into intense exercise immediately after giving birth, but that isn’t a great idea.
Most health professionals recommend taking up to 6 weeks to recover after a vaginal delivery and up to 10 weeks after a C-section before returning to exercise like lifting weights.
That doesn’t mean you have to do nothing during that time. In fact, gentle, well-chosen movement early on is usually helpful—you just want to avoid the stuff that spikes pressure or makes you strain.
And that’s why you should focus on things such as . . .
- Correcting posture
- Learning how to move (especially getting up and lying down) without straining your abs
- Doing breathing, pelvic floor, and core-strengthening exercises
How to Correct Your Posture to Support Healing

Many women notice their posture changes after giving birth. Some begin to over-arch their lower back, pushing the pelvis forward in front of the chest and knees (figure 1). Others do the opposite, with the lower back and hips tucking under as the back muscles compensate for weaker abs, pushing the chest forward and tilting the pelvis downward (figure 2).
There’s no such thing as “perfect posture,” but aiming for a neutral position—where your shoulders, hips, and knees are roughly stacked on top of each other—generally places less stress on your abs and connective tissue (figure 3).
Throughout the day, get into the habit of checking in with your posture during everyday tasks. For example, stand tall while brushing your teeth instead of hunching over the sink, and when carrying your newborn, keep your hips under your shoulders rather than letting them drift forward or to the side.
When You Should Get Professional Help
Most women can resolve diastasis recti at home, but it’s smart to see a doctor or physical therapist who specializes in diastasis recti if you find a gap that’s larger than five centimeters (finger breadths) wide.
Deep Core Breathing and Bracing for Diastasis Recti Exercises

If you only take one thing from this article, make it this:
Breathing and bracing are the foundation of every diastasis recti exercise that actually helps.
That’s because closing the gap in your abs isn’t just about “working your abs.” It’s about regaining strength through your midsection without cranking up intra-abdominal pressure and straining the linea alba (the connective tissue that joins the two vertical columns of the rectus abdominis muscles).
Breathing and pelvic floor exercises are the first step because they gently train the deep muscles that stabilize your midsection (your pelvic floor and transverse abdominis).
Once you can create tension in these muscles without holding your breath or bearing down—and without pushing your belly outward (“doming”)—you can progress to harder training without stressing the connective tissue you’re trying to heal.
The drills below are how you learn that skill—practice them until you can engage your deep core without holding your breath, bearing down, or doming.
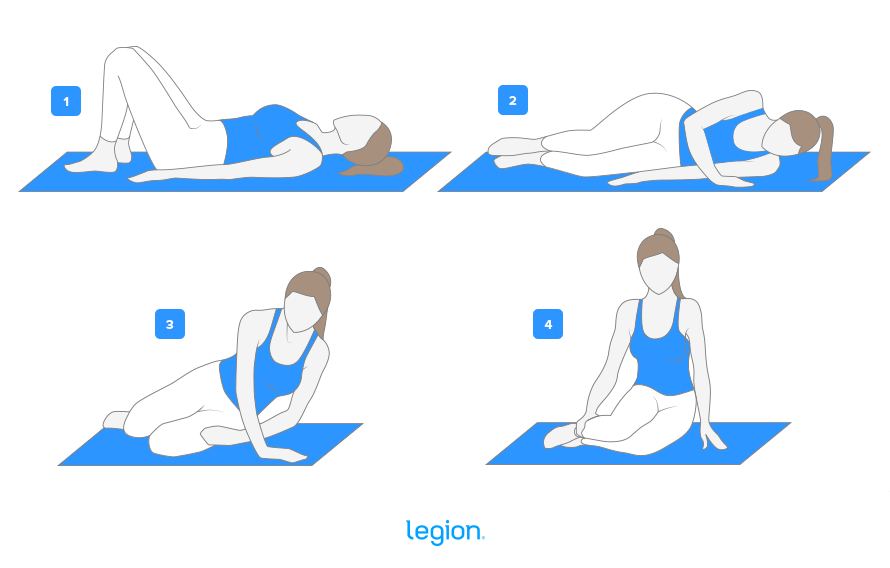
Diaphragmatic Breathing
- Sit upright pressing your left palm against your chest and your right palm against the top of your belly, just below your ribs.
- Inhale into your belly so that you feel your belly expand against your right hand but your left hand remains still.
- Once you’ve inhaled fully, exhale while contracting your pelvic floor muscles (a good cue for this is to imagine that you’re trying to stop the flow of urine).
TVA Holds
- Sit upright pressing your right palm against the top of your belly, just below your ribs.
- Inhale into your belly so that you feel your belly expand against your right hand.
- Once you’ve inhaled fully, exhale while making a “shh” sound. As you exhale, contract your pelvic floor muscles and draw your abs toward your spine.
- Once you’ve exhaled fully, hold the position for 5–10 seconds.
Kegels
- Sit upright and inhale for a 5-second count. As you inhale, contract your pelvic floor muscles.
- Relax your pelvic floor muscles and exhale for a 5-second count.
Elevators
Before you begin with elevators, imagine the hardest you can contract your pelvic floor muscles. This is your “level 3.”
- Sit upright, relax your pelvic floor muscles, and inhale.
- Once you’ve inhaled fully, exhale slowly (aim to exhale for a 10-second count).
- As you begin to exhale, contract your pelvic floor muscles to a “level 1” for 2–3 seconds (1 on a scale of 1–3).
- Continue to exhale and contract to “level 2” for 2–3 seconds.
- Continue to exhale and contract to “level 3” for the remainder of your exhale.
- Once you’ve fully exhaled, relax your pelvic floor.
Breathing and Pelvic Floor Workout
Here’s how to put the above exercises into a workout. Most women can do this workout within a week or two of giving birth, though if it feels uncomfortable, it’s best to allow yourself more time before starting. For best results, perform this workout every day throughout your recovery:
- Diaphragmatic Breathing: 10 reps with 10–20 seconds rest between reps
- TVA Holds: 10 reps with 20–30 seconds rest between reps
- Kegels: 10–20 reps
- Elevators: 10 reps with 20–30 seconds rest between reps
Foundational Diastasis Recti Exercises (Beginner Progression)
After a few weeks of breathing and pelvic floor training, most women are ready to add simple movements that strengthen their midsections.
A quick rule to follow as you do these:
If you feel strain down the middle of your abs or you notice your belly pushing outward, make the movement easier (smaller range of motion, slower tempo, less leverage) or stop and come back to it later.
Core Brace
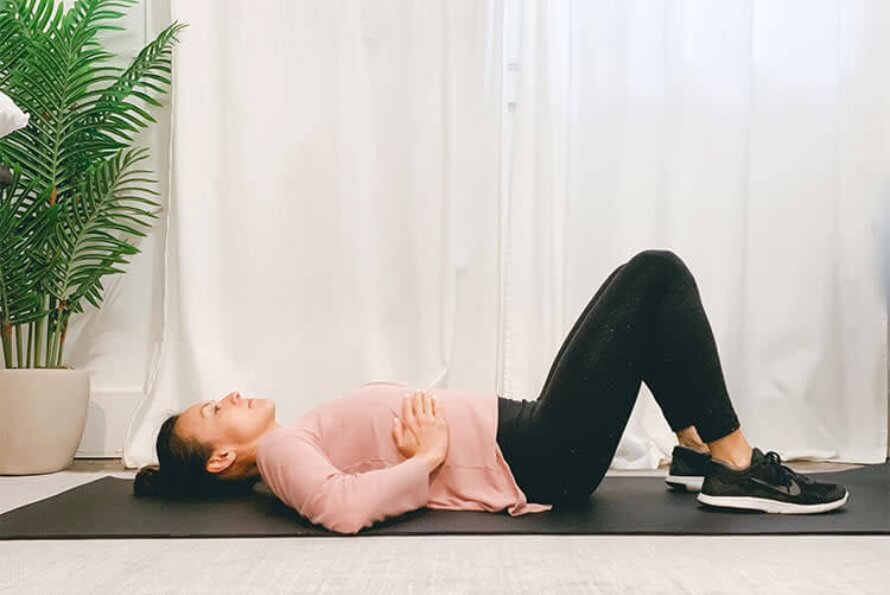
- Lie on your back with knees bent and feet flat.
- Place your hands on your upper belly (just below your ribs).
- Breathe normally, then gently contract your pelvic floor and “pull” your abs toward your spine.
- Hold 5–10 seconds, relax, and repeat.
Pelvic Floor Tilt
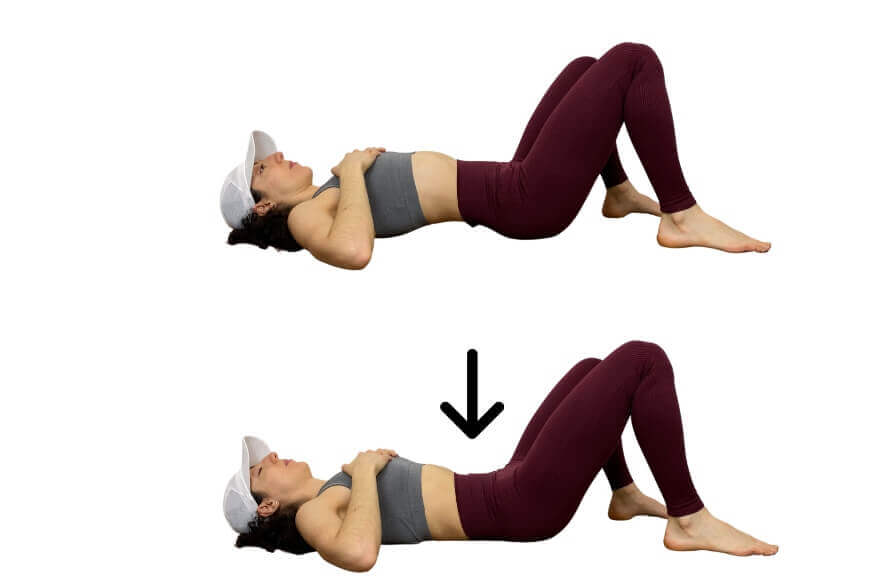
- Lie on your back with knees bent and feet flat, arms by your sides.
- Press your lower back into the floor as you engage your pelvic floor and “pull” your abs in.
- Exhale and tuck your tailbone slightly so your hips tip up.
- Hold 3–5 seconds, then return to neutral.
Heel Slide
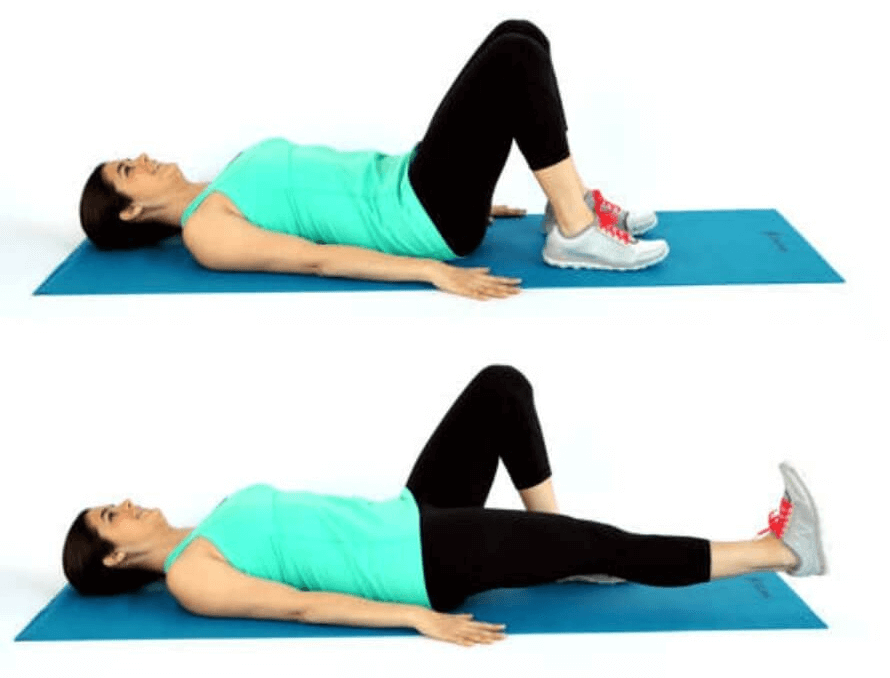
- Lie on your back with knees bent and feet flat.
- Engage your pelvic floor and gently “pull” your abs toward your spine.
- Slowly slide your right heel away until your leg is almost straight (keep your low back down).
- Slide it back and switch sides.
Intermediate Diastasis Recti Exercises (How to Progress Safely)
After a week or two of doing the foundational exercises, you’ll likely be ready to slowly introduce intermediate exercises—using the same guardrails as before to make sure you’re ready.
Specifically, if you see your belly push outward or a ridge appear down the center of your abs—or you catch yourself holding your breath to brace—make the movement easier or stop and come back to it later.
Dead Bug
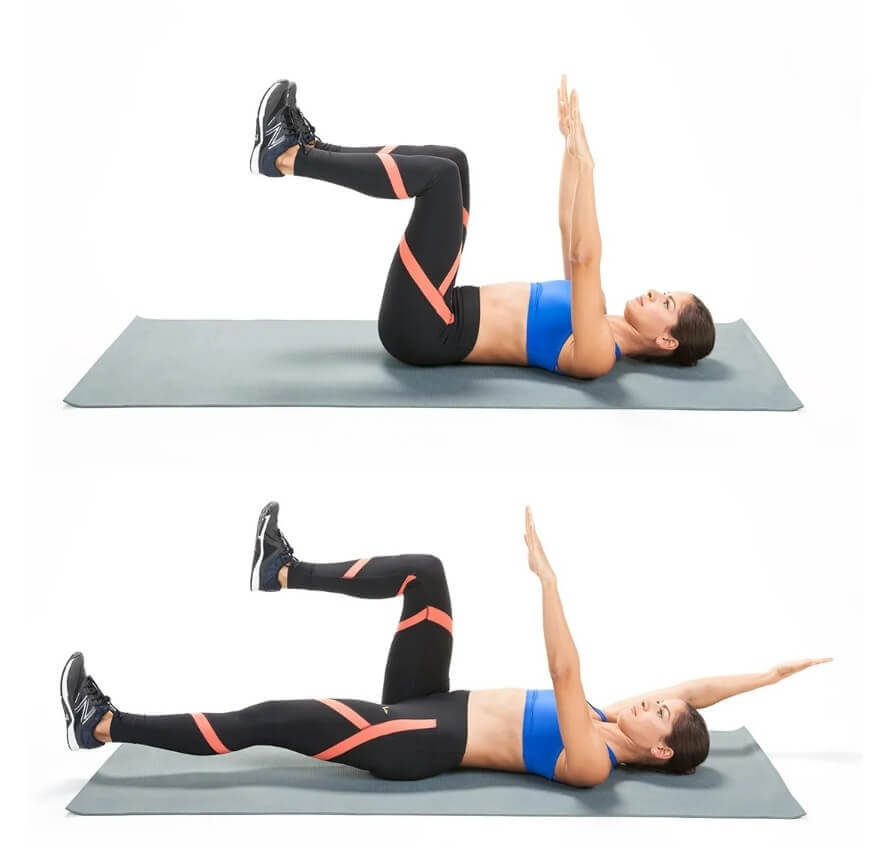
- Lie on your back with your hips and knees bent about 90 degrees and your arms straight up.
- Gently brace, then extend one leg and the opposite arm.
- Return to the start and switch sides.
Glute Bridge
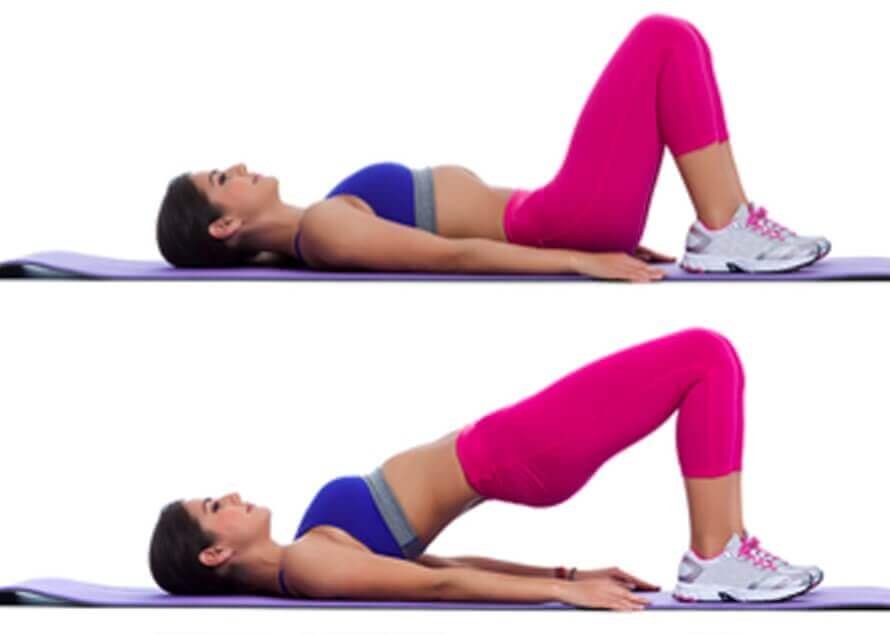
- Lie on your back with knees bent and feet flat.
- Brace gently, then lift your hips until your body forms a straight line from shoulders to knees.
- Pause, then lower under control.
Bird Dog
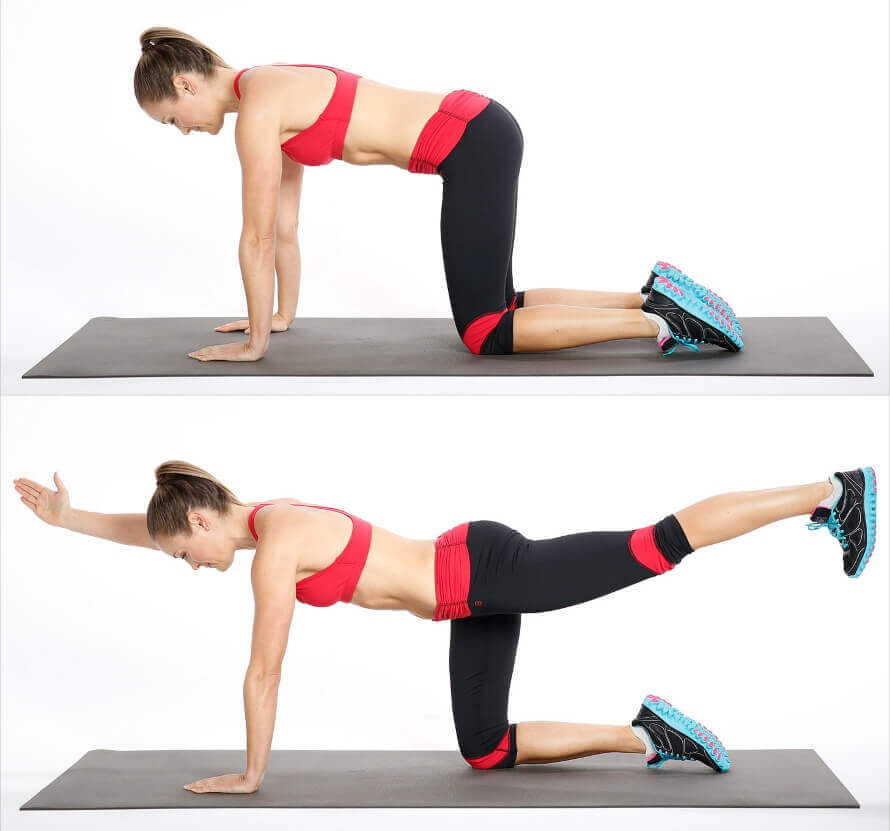
- Start on hands and knees.
- Brace, then extend one leg behind you and the opposite arm in front of you.
- Pause briefly, return, and switch sides.
Toe Taps
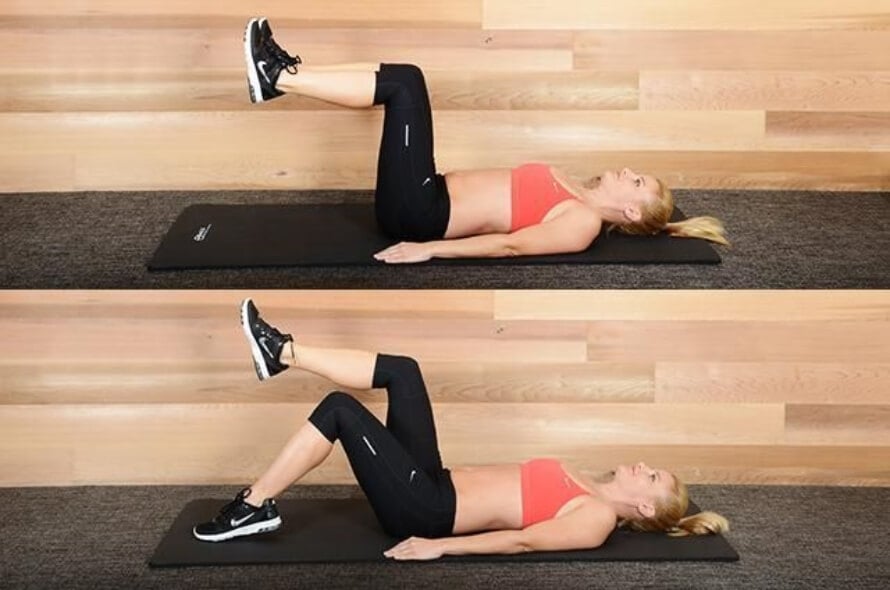
- Lie on your back and bring your legs up so your hips and knees are bent 90 degrees.
- Engage your pelvic floor and gently “pull” your abs in.
- Lower one foot until your toe taps the floor, then bring it back up.
- Alternate sides, keeping your belly flat (no doming).
Exercises and Movements to Avoid with Diastasis Recti
Skip any exercise that makes you strain, pushes your belly outward, or creates a ridge down the middle of your abs. If that happens, the exercise is too advanced right now—so regress it or come back to it later.
Common troublemakers include:
- Crunches, planks, and other ab exercises: This is a gray area, but early on they can make you strain or push your belly out—so it’s usually best to hold off at first.
- Anything that makes you hold your breath: If you have to hold your breath and brace, scale it down. And yes—that usually includes weightlifting (more on this soon).
- Running and jumping: Save “high-impact” exercise until you have better core control and strength.
Can You Lift Weights with Diastasis Recti?
We don’t have good research showing whether resistance training is safe or effective for diastasis recti. Because of that uncertainty, it’s usually best to take a conservative approach.
After giving birth, the first step isn’t getting back to the gym—it’s rebuilding basic core strength, functionality, and control. That’s where the breathing and abdominal exercises in this article come in, and most women can begin working on those well before they’re cleared for harder exercise (usually in the first few weeks after giving birth).
At some point—often around 6–10 weeks postpartum—you’ll be cleared by your doctor. That clearance is important, but it’s also easy to misunderstand. It doesn’t mean your body is fully ready for heavy training again. It just means there’s no major medical reason you can’t exercise.
From there, let your body set the pace. If your core feels strong and recovered, do some light strength training 2–3 times per week. If it doesn’t, spend more time on the core work and try weightlifting again later.
There’s no prize for rushing this. Taking a slower, more cautious approach now usually makes it easier to return to full training later—without unnecessary setbacks.
Diastasis Recti Workouts (A Simple Way to Put This Together)
Now that you know which exercises to do, the next question is how to organize them into workouts.
The workouts below keep things simple and structured, so you know exactly what to do each session.
Diastasis Recti Ab Workout 1
- Core Brace: 10 sets of 1 rep with 10–20 seconds rest between sets
- Pelvic Floor Tilt: 3 sets of 5–10 reps with 90 seconds rest between sets
- Heel Slide: 3 sets of 5–10 reps (on each side) with 90 seconds rest between sets
Diastasis Recti Ab Workout 2
- Core Brace: 10 sets of 1 rep with 10–20 seconds rest between sets
- Dead Bug: 3 sets of 5–10 reps (on each side) with 90 seconds rest between sets
- Pelvic Floor Tilt: 3 sets of 5–10 reps with 90 seconds rest between sets
- Heel Slide: 3 sets of 5–10 reps (on each side) with 90 seconds rest between sets
Diastasis Recti Ab Workout 3
- Core Brace: 10 sets of 1 rep with 10–20 seconds rest between sets
- Dead Bug: 3 sets of 5–10 reps (on each side) with 90 seconds rest between sets
- Glute Bridge: 3 sets of 5–10 reps with 90 seconds rest between sets
- Bird Dog: 3 sets of 5–10 reps (on each side) with 90 seconds rest between sets
Diastasis Recti Ab Workout 4
- Core Brace: 10 sets of 1 rep with 10–20 seconds rest between sets
- Dead Bug: 3 sets of 5–10 reps (on each side) with 90 seconds rest between sets
- Glute Bridge: 3 sets of 5–0 reps with 90 seconds rest between sets
- Bird Dog: 3 sets of 5–10 reps (on each side) with 90 seconds rest between sets
- Toe Taps: 3 sets of 5–10 reps (on each side) with 90 seconds rest between sets
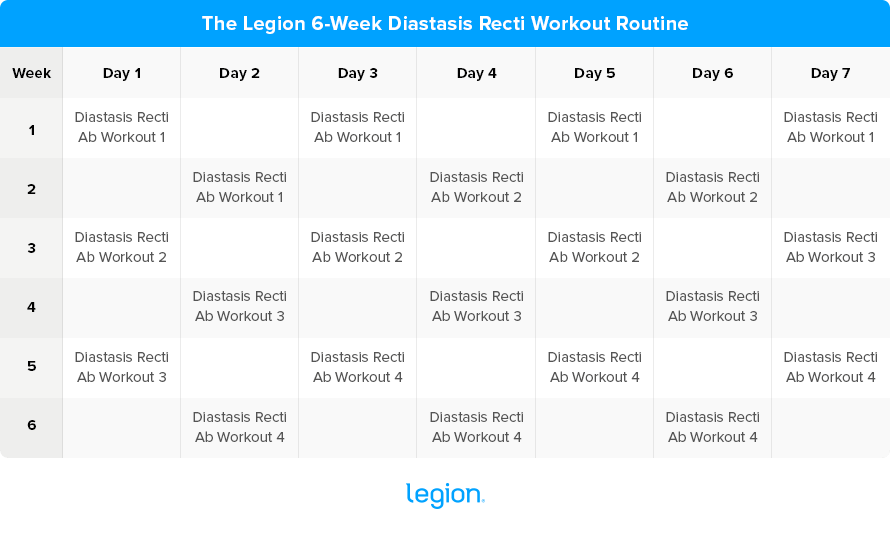
The Legion 6-Week Diastasis Recti Workout Routine
Below is a sample 6-week plan showing how you might rotate the workouts above over time.
You can usually begin the Breathing and Pelvic Floor Workout about one to two weeks after giving birth, and most women benefit from doing it daily. This helps you rebuild basic core control before moving on to anything more demanding.
Once that feels comfortable, you can begin adding in the workouts from this routine. Many women prefer to start each workout with the Breathing and Pelvic Floor Workout as a “warmup,” but that’s entirely optional.
Think of this 6-week plan as an ideal progression, not a strict schedule.
If you don’t feel ready to move on, keep repeating the same workout instead of progressing. You might do the same workout for a few extra days—or even an extra week—before moving on, and that’s fine.
Try to complete each workout in one session when you can, but don’t stress if that’s not possible. If you need to stop (to tend to your baby, for example), just pick up where you left off later.
If you ever feel unsure about whether your body is ready to progress—or something doesn’t feel right—pause and check in with your doctor before continuing.
The Bottom Line on Diastasis Recti Exercises
Diastasis recti usually improves over time, but the right exercises can help you regain strength and function faster—if you approach them the right way.
Start by avoiding movements that make you strain or push your belly outward, and focus first on breathing, pelvic floor work, and gentle core exercises that rebuild control.
Progress slowly, let your body set the pace, and don’t rush back into intense training. With patience, consistency, and smart progression, most women can restore the core strength they had pre-pregnancy.
FAQ #1: Can diastasis recti be corrected with exercise?
Often, yes—especially when the separation is mild to moderate. The key is doing the right kind of exercise: start with breathing, pelvic floor training, and gentle core exercises that help you rebuild control and strength without straining or pushing your belly outward.
Progress to harder exercises only when the easier ones feel controlled and comfortable. And if you have a large gap (around five centimeters or more), or anything feels painful or unusual, it’s smart to see a doctor or pelvic-floor physical therapist.
FAQ #2: How to flatten a stomach with diastasis?
Focus on function rather than “flattening.” When your deep core is working well again, your stomach often flattens as a side effect.
In practical terms, avoid movements that make you strain or push your belly outward, rebuild control with breathing and pelvic floor work, then add the foundational and intermediate exercises in this article and progress slowly.
Also pay attention to everyday habits that can keep stressing your abs—like posture and how you get up and lie down. If your belly is still significantly protruding months later, or you’re not improving, get checked by a qualified professional.
FAQ #3: How to fix diastasis recti for men?
The basic idea is similar: rebuild core strength and control without straining or pushing the belly outward, then progress gradually. The main difference is the cause. In women, diastasis recti is usually pregnancy-related.
In men, it can be related to weight gain, improper bracing during training, or other factors—and sometimes a midline bulge can be a hernia instead.
So if you’re a man with a noticeable ridge or bulge down the middle of your abs (especially if there’s pain), it’s smart to get checked by a doctor before trying to “train it away.”
Want More Content Like This?
Check out these articles:
- The Complete Guide to Postpartum Weight Loss
- How to Fix “Mom Butt” After Pregnancy
- Can You Take Pre-Workout While Breastfeeding? Guide for Moms
Scientific References +
- Beamish, Nicole F, et al. “Impact of Postpartum Exercise on Pelvic Floor Disorders and Diastasis Recti Abdominis: A Systematic Review and Meta-Analysis.” British Journal of Sports Medicine, vol. 59, no. 8, 18 Dec. 2024, p. bjsports-2024-108619, bjsm.bmj.com/content/early/2024/12/17/bjsports-2024-108619#xref-ref-116-1, https://doi.org/10.1136/bjsports-2024-108619.
- “The Journal of Women’s & Pelvic Health Physical Therapy.” Journals.lww.com, journals.lww.com/jwphpt/Pages/default.aspx.
- Benjamin, D. R., van de Water, A. T. M., & Peiris, C. L. (2014). Effects of exercise on diastasis of the rectus abdominis muscle in the antenatal and postnatal periods: a systematic review. Physiotherapy, 100(1), 1–8. https://doi.org/10.1016/J.PHYSIO.2013.08.005
- Keeler, J., Albrecht, M., Eberhardt, L., Horn, L., Donnelly, C., & Lowe, D. (2012). Diastasis Recti Abdominis: A Survey of Women’s Health Specialists for Current Physical Therapy Clinical Practice for Postpartum Women. Undefined, 36(3), 131–142. https://doi.org/10.1097/JWH.0B013E318276F35F
- Gitta, S., Magyar, Z., Tardi, P., Fuge, I., Jaromi, M., Acs, P., Garai, J., Bodis, J., & Hock, M. (2016). How to Treat Diastasis Recti Abdominis with Physical Therapy: A Case Report. Journal of Diseases, 3(2), 16–20. https://doi.org/10.18488/JOURNAL.99/2016.3.2/99.2.16.20
- Dufour, S., Bernard, S., Murray-Davis, B., & Graham, N. (2019). Establishing Expert-Based Recommendations for the Conservative Management of Pregnancy-Related Diastasis Rectus Abdominis: A Delphi Consensus Study. Journal of Women’s Health Physical Therapy, 43(2), 73–81. https://doi.org/10.1097/JWH.0000000000000130
- Gluppe, S., Engh, M. E., & Bø, K. (2021). What is the evidence for abdominal and pelvic floor muscle training to treat diastasis recti abdominis postpartum? A systematic review with meta-analysis. Brazilian Journal of Physical Therapy, 25(6), 664–675. https://doi.org/10.1016/J.BJPT.2021.06.006