The incline bench press has been a go-to chest exercise for bodybuilders for decades, and for good reason.
As well as being an excellent all-around chest exercise, it helps you develop your upper chest, which is vital for growing big, proportional pecs.
In this article, you’ll learn proper incline bench press form, how to find the best incline bench angle for you, the benefits of the exercise, which muscles it works, how to get the most out of it, the most effective variations and alternatives, and more.
How to Incline Bench Press with Proper Form
Before you begin incline benching, you must find an incline bench.
Some gyms have a dedicated incline bench press station. If your gym has one, use it—it’s the sturdiest equipment for the job.
If it doesn’t, an adjustable bench in a squat rack is a worthy alternative. Position yourself so the bar is directly over your face when it’s in the rack and about 2-to-3 inches lower than if you were holding it with your elbows locked.
The next step is to decide what angle for the incline bench works best for you.
Finding the Best Incline Bench Angle
Many say that the best angle for incline bench press is 30 degrees.
The basis of this claim is a study published in 2020 in the International Journal of Environmental Research and Public Health, which had 30 weightlifters perform the incline bench press at various angles while scientists measured their pectoral muscle activation.
The results showed that, on average, muscle activation in the upper pecs was highest when the incline bench press angle was 30 degrees.
Nevertheless, there are a couple of reasons we shouldn’t assume 30 degrees is the best angle for incline bench for everyone:
- We only have data from one study involving just 30 people—that’s not enough data to draw firm conclusions.
- The researchers only measured muscle activation, which isn’t always the best proxy for muscle growth.
A better approach is to consider an incline bench angle of 30 degrees as a good starting point. You can adjust the angle from here depending on how the exercise feels.
For example:
- Lower the incline bench press angle to around 15 degrees if you feel your shoulders working more than your pecs.
- Try arching your back less or increasing the incline to around 45 degrees if you feel your mid or lower chest working more than your upper pecs,
For most, an incline of more than 45 degrees trains the shoulder (particularly the anterior deltoids) more than the pecs, which isn’t the goal of the exercise. That said, it may be worth trying if you have a particularly exaggerated back arch.
1. Set Up
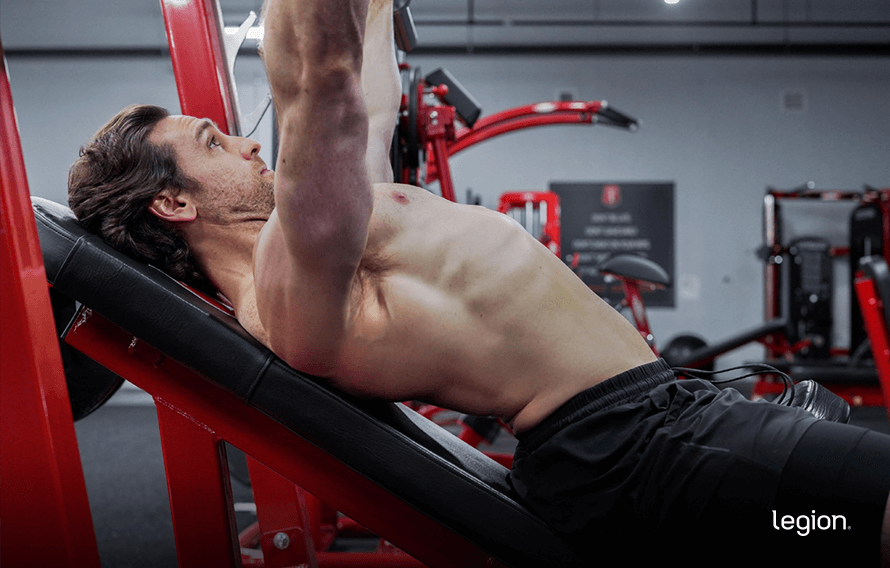
Lie on a bench angled at 15-to-45 degrees and plant your feet on the floor. Adjust the seat height so your eyes are under the bar when you lie down:
Pull your shoulder blades together and down like this:
Grab the bar with a slightly wider than shoulder-width grip. Hold the bar low in your hands, closer to your wrists than your knuckles, and squeeze it as hard as you can:
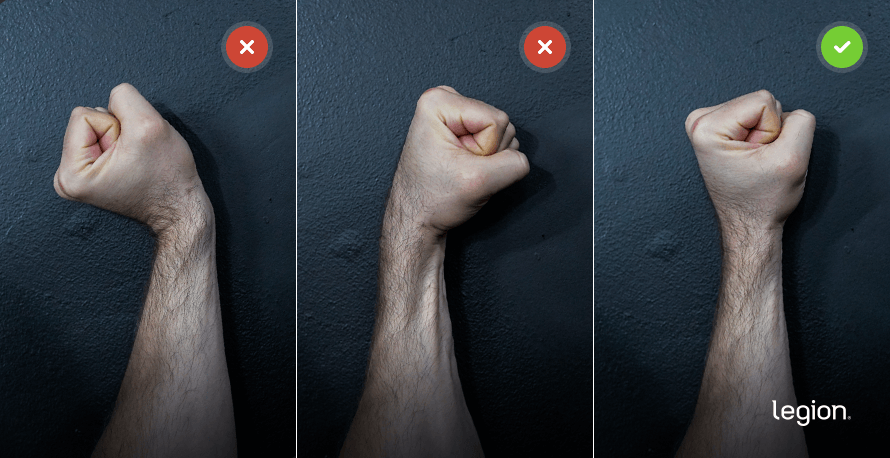
Your hands are the correct distance apart when your forearms are vertical at the bottom of each rep like this:
Plant your feet on the floor about shoulder-width apart, and play around with different positions until you find one that feels most stable:

Arch your back while keeping your shoulders and butt in contact with the bench like this:
Unrack the bar by locking your elbows out to move the bar off the hooks.
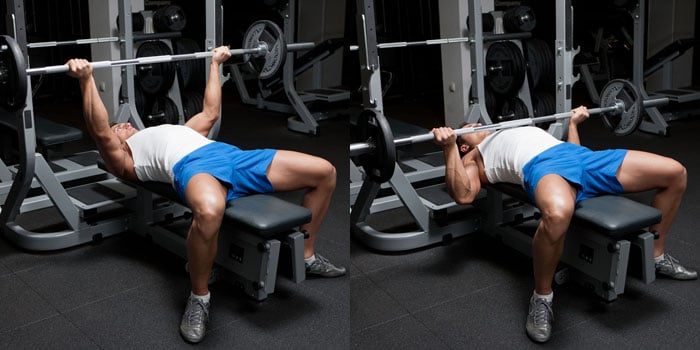
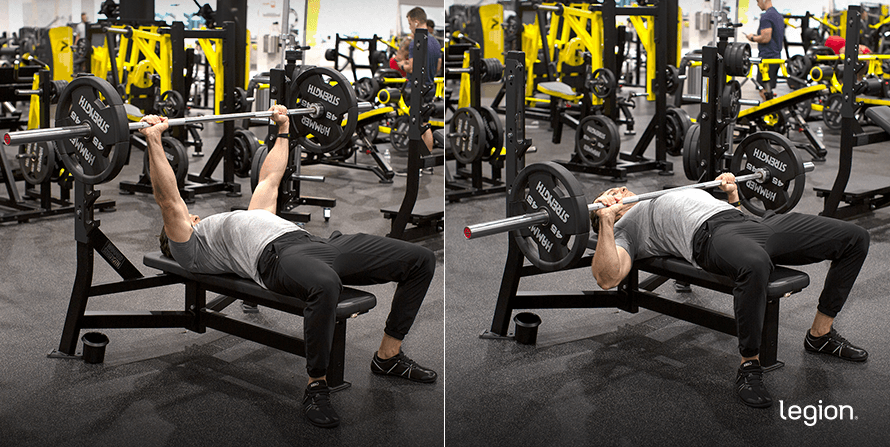
2. Descend
Lower the barbell to your upper chest:
Throughout each rep, keep your elbows tucked 6-to-10 inches from your sides:
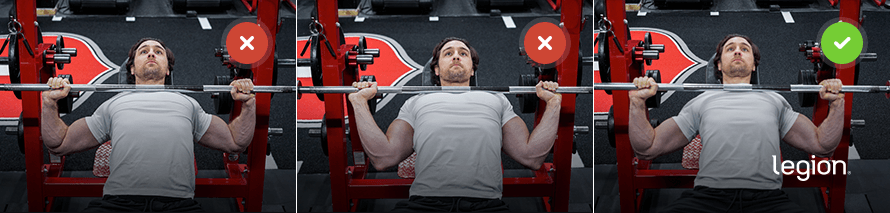
Flaring your elbows more than this is hard on the shoulder joints, and tucking them more can be uncomfortable for your elbows.
3. Press
Keeping your shoulder blades down and pinched, your elbows tucked, your lower back slightly arched, your butt on the bench, and your feet on the floor, press the bar back to the starting position.
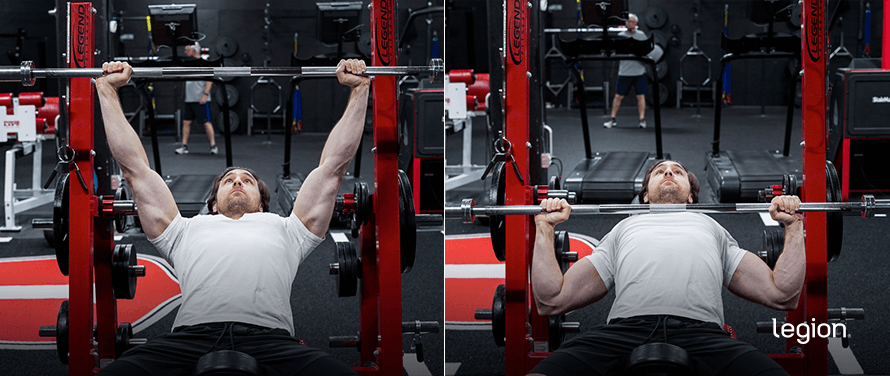
Here’s how perfect incline bench press form should look when you put it all together:
Incline Bench Press: Benefits
1. It trains several major muscle groups.
The incline bench press trains several major upper body muscle groups simultaneously, particularly the pecs, triceps, deltoids, lats, forearms, and traps.
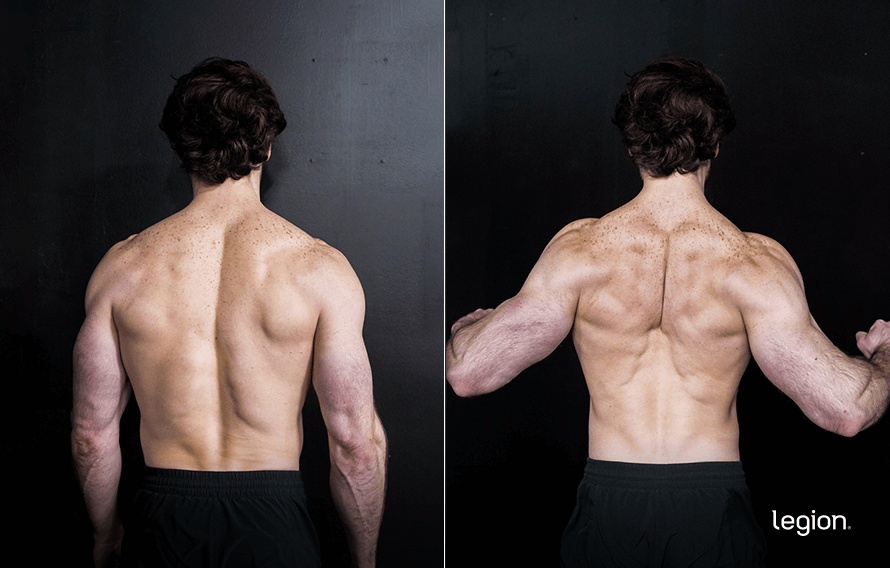
2. It emphasizes your “upper chest.”
The main difference between the incline vs flat bench is that the incline press emphasizes the clavicular head of the pecs, also known as the “upper chest.” Here’s how the upper portion of the chest looks:
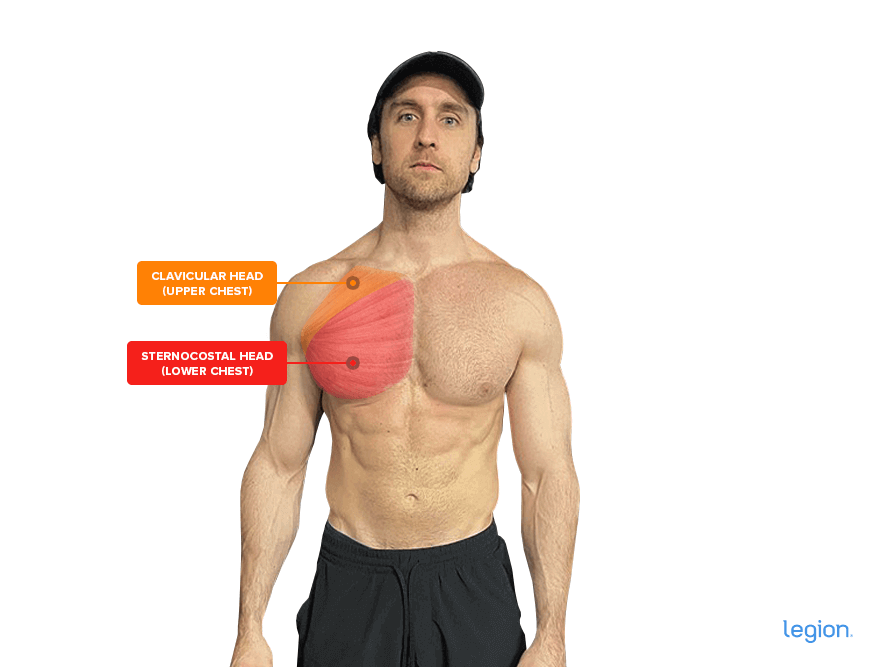
The benefit of targeting the upper chest is that it helps you build proportional pecs where the upper and lower portions are equally well developed.
3. It allows you to lift heavy weights safely and progress regularly.
The incline barbell bench press is more balanced and easier to control than dumbbell chest exercises, so you can lift heavier weights more safely.
Since most gyms have barbell plates as small as 2.5 pounds, you can also increase the weight in smaller, more sustainable jumps than you can with dumbbells, making it easier to consistently gain strength without plateauing or getting injured.
This matters because exercises that allow you to lift heavy weights safely and progress regularly are typically the most effective for gaining muscle and strength.
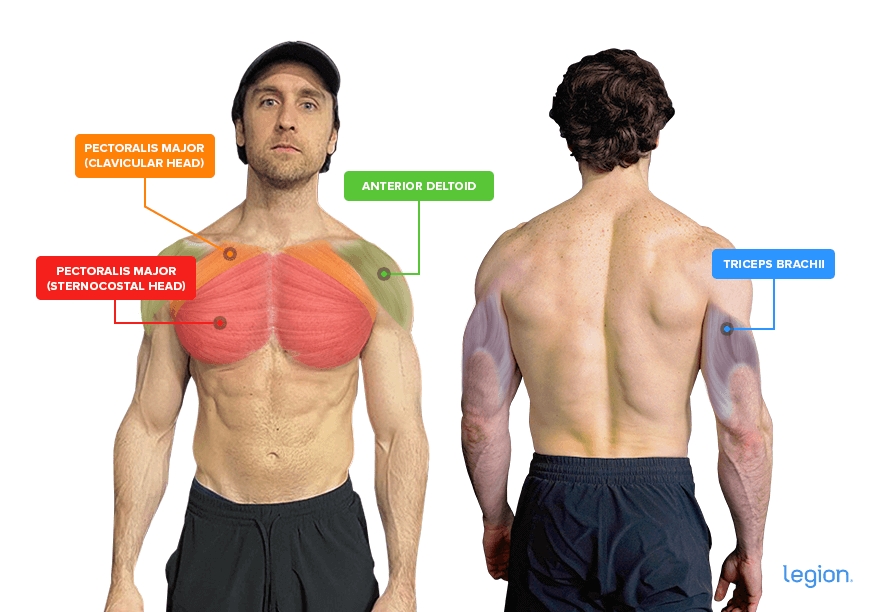
Incline Bench Press: Muscles Worked
The main muscles worked in the incline bench press are:
- Pectoralis major and minor
- Deltoids
- Triceps
It also trains your lats, traps, and forearms to a lesser degree.
Here’s how the main muscles worked in the incline bench press look on your body:
3 Tips for More Effective Incline Pressing
1. End every set 1-to-3 reps shy of muscle failure.
As I explain in my fitness books for men and women, to maximize your results, you must take most sets of the inclined bench to within a rep or two of failure.
Ask yourself at the end of each set, “If I had to, how many more reps could I have gotten with good form?” If the answer is more than two, increase the weight or reps to make your next set more challenging.
[Read More: Does Training to Failure Help You Build More Muscle? What Science Says]
2. Once you hit the top of your rep range for a set, move up in weight.
If your training program calls for 4-to-6 reps of the inclined bench press and you get 6 reps for a set, add 10 pounds to your next set.
If you manage 3 or fewer reps with the new weight, reduce the weight by 5 pounds to ensure you stay in the 4-to-6 rep range.
[Read More: Double Progression Guide: How to Use Double Progression to Gain Muscle and Strength]
3. Rest 2-to-4 minutes between sets.
Resting 2-to-4 minutes between sets gives your muscles enough time to fully recoup their strength so you can give maximum effort each set.
[Read More: How Long Should You Rest Between Sets to Gain Muscle and Strength?]
The Best Incline Bench Press Variations and Alternatives
1. Incline Dumbbell Bench Press

The incline dumbbell bench press is the same as the incline barbell bench press, except you use dumbbells instead of a barbell. Dumbbells allow you to train through a longer range of motion, which generally benefits muscle growth. The only downside is that you can’t lift as much weight as when you press with a barbell.
2. Close-Grip Bench Press

In addition to training the triceps better than other pressing exercises, the close-grip bench press emphasizes the upper pecs, making it an excellent alternative to the incline bench.
3. Reverse-Grip Barbell Bench Press
Like the incline press, the reverse-grip bench press emphasizes the clavicular head of the pecs, making it a solid alternative for training the same muscles.
4. Smith Machine Incline Bench Press

The Smith machine incline bench press probably isn’t quite as effective as the incline barbell bench press for building strength and muscle. Still, it’s a viable alternative for those without access to a barbell or dumbbells.
5. Flat Barbell Bench Press
While the flat bench press may not train the upper pec as much as the incline variation, it still trains the entire pec to a high degree. It also allows you to train with heavy weights and add weight to the bar regularly, making it ideal for gaining size and strength.
Incline Bench Press FAQs
FAQ #1: Incline vs. Flat Bench: Which is better?
The incline and flat bench are similarly effective upper body exercises, so neither is better or worse than the other. The incline bench press emphasizes the upper pecs slightly more than the flat bench, while the flat bench trains the mid and lower pecs more than the incline press.
That’s why comparing incline vs flat bench isn’t particularly beneficial. A more sensible approach is to include both in your training.
FAQ #2: Is incline bench harder than flat bench?
Most people find the incline bench harder than the flat bench. This is because the incline bench targets your upper chest and “front delts,” which are typically weaker than the larger muscle groups involved in a flat bench press. As a result, you might notice that you can’t lift as much weight on the incline bench.
FAQ #3: Is the incline bench 30 or 45 degrees?
The fixed incline bench at most gyms is angled at 45 degrees. If this angle doesn’t suit your preferences, mobility, or bodily structure, perform the incline bench press on an adjustable bench in a squat rack. Doing the exercise like this gives you the freedom to change the incline bench angle to find a position that works for you.
Scientific References +
- Rodríguez-Ridao, David, et al. “Effect of Five Bench Inclinations on the Electromyographic Activity of the Pectoralis Major, Anterior Deltoid, and Triceps Brachii during the Bench Press Exercise.” International Journal of Environmental Research and Public Health, vol. 17, no. 19, 8 Oct. 2020, p. 7339, https://doi.org/10.3390/ijerph17197339.
- Vigotsky, Andrew D., et al. “Greater Electromyographic Responses Do Not Imply Greater Motor Unit Recruitment and “Hypertrophic Potential” Cannot Be Inferred.” Journal of Strength and Conditioning Research, vol. 31, no. 1, Jan. 2017, pp. e1–e4, https://doi.org/10.1519/jsc.0000000000001249.
- Trebs, Arthur A, et al. “An Electromyography Analysis of 3 Muscles Surrounding the Shoulder Joint during the Performance of a Chest Press Exercise at Several Angles.” Journal of Strength and Conditioning Research, vol. 24, no. 7, July 2010, pp. 1925–1930, insights.ovid.com/strength-conditioning-research/jscr/2010/07/000/electromyography-analysis-muscles-surrounding/31/00124278, https://doi.org/10.1519/jsc.0b013e3181ddfae7.
- Barnett, Chris , et al. “Effects of Variations of the Bench Press Exercise on The... : The Journal of Strength & Conditioning Research.” LWW, 2019, journals.lww.com/nsca-jscr/abstract/1995/11000/effects_of_variations_of_the_bench_press_exercise.3.aspx.
- Schoenfeld, Brad J. “The Mechanisms of Muscle Hypertrophy and Their Application to Resistance Training.” Journal of Strength and Conditioning Research, vol. 24, no. 10, 2010, pp. 2857–72, https://doi.org/10.1519/JSC.0b013e3181e840f3.
- Bj, Schoenfeld, et al. “Longer Interset Rest Periods Enhance Muscle Strength and Hypertrophy in Resistance-Trained Men.” Journal of Strength and Conditioning Research, 1 July 2016, pubmed.ncbi.nlm.nih.gov/26605807/.
- Barnett, Chris , et al. Effects of Variations of the Bench Press Exercise on the EMG Activity of Five Shoulder Muscles. Nov. 1995, p. The Journal of Strength and Conditioning Research 9(4), https://doi.org/10.1519/00124278-199511000-00003.