If you’re like me, you got into working out because you wanted three things:
- A big chest.
- Bulging biceps.
- Washboard abs.
(Our motivations may have matured since, but hey, there’s no shame in our not-so-humble beginnings.)
And if you’re reading this article, you need some help with at least number one.
Maybe you’re new to lifting and unsure of where to even start. Maybe you’re a seasoned gym rat looking to break through a plateau. Or maybe you’re somewhere in between.
Regardless, you’ve come to the right place.
Because by the end of this article, you’re going to know exactly what you need to do for more chest gains in the next 30 days than you’ve seen in the last 3 months.
(Hint: it’s more or less what you would think–train your chest a lot–but isn’t that simplistic.)
I have to warn you, though—it’s not going to be easy.
You can’t get a set of wide, thick, “armor plate” pecs by popping some pills and powders and doing some pushups and pullovers.
So if you’re looking for “weird tricks” or “workout hacks,” then this isn’t for you.
If, however, you’re ready to learn the simple science of building a big chest, and if you’re ready to put in some work, then keep reading.
Table of Contents
+
Why We Want More Than Just a “Big Chest”

“Help, my chest is too small!”
If I had a nickel for every time I’ve heard this, well, I’d be making money in a really strange way.
All these guys want for Christmas, they say, is a “big chest”—something you can probably relate to.
It’s a misguided ambition, though.
It’s like “weight loss”—the phrase captures the essence of what we’re trying to do but isn’t exactly accurate, because fat loss is the real goal. That is, while we may say we want to “lose weight,” what we really mean is we want to lose fat and not muscle.
Similarly, we may say we simply want a “bigger chest,” but accomplishing this won’t necessarily give us the look that we want.
For example, check out the following picture:

He has a good physique but look closer at the upper and lower portions of his chest.
Something looks kind of off, right? His pecs look underdeveloped and almost “droopy.” Why?
Well, all the mass is on the lower and outer portions while the upper and inner portions are almost non-existent.
This is very common, is the direct result of chest training mistakes, and, fortunately, is both preventable and correctable.
I’m speaking from experience here. Check out the following picture of me from a few years ago:

Look at the upper portion of my left pec (the right looks bigger than it was because of how I was holding the phone).
As you can see, I too had a very bottom-heavy chest with a lagging “upper chest.”
I got to work on it shortly after taking that picture, however, doing the exact types of things as what I’m going to share in this article, and here’s what it got me:

Again, let’s focus on the upper portion of my pecs and compare them to the previous picture.
Quite a difference, no?
“But wait a minute,” you might be thinking. “Isn’t the whole ‘upper’ and ‘lower’ chest thing a myth?”
I’m glad you asked…
The Truth About the “Upper Chest”
Many people think that the “upper chest” is an old bro’s tale, like negative-calorie foods or “muscle confusion.”
They’re of the mind that you have one large pectoral muscle that is stimulated equally by any exercise.
And they’re wrong.
Many other people think the upper chest exists but can’t or doesn’t need to be specially addressed in your training.
They’re wrong too.
To find out why, let’s start at the top.
There is a part of the “chest muscle” that forms what we call the “upper chest.” It’s known as the clavicular pectoralis and here’s what it looks like:
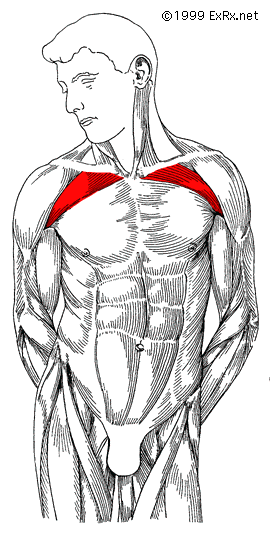
As you can see, this small muscle is a part of the big chest muscle (the pectoralis major), but its fibers run at a different angle.
This “little” difference is why research shows that certain exercises, like the flat and decline bench press, emphasize the main (large) portion of the chest muscle, whereas others, like the incline and reverse-grip bench press, emphasize the smaller upper portion.
Notice that I said emphasize and not isolate.
That’s because all chest exercises that emphasize one portion of the muscle group do, to some degree, involve the others. Nevertheless, one of the most important lessons I learned about building a chest is this:
Ideal chest development requires a lot of emphasis on the clavicular pectoralis.
There are two reasons for this:
1. It’s a small, stubborn muscle that’s easily overtopped by the pec major.
The most popular chest exercises—flat and decline presses—emphasize the larger portion of the pecs, which grows faster than the smaller, upper portion.
2. The best exercises for the upper chest also happen to be great for overall chest growth.
Doing a lot of incline pressing is one of the best ways to ensure your upper chest doesn’t fall behind, but it’s also extremely effective for developing the rest of your chest.
(Reverse-grip bench pressing is helpful too, which we’ll talk more about soon.)
Muscle Building 101
How to Get a Bigger Chest
I used to make two major mistakes in my chest workouts:
1. I mostly did the wrong chest exercises.
I spent far too much time on machines and isolation exercises and far too little time on compound movements like presses and dips.
2. I did too much high-rep training.
I trained primarily to do a lot of sets and get a big pump (rather than to get stronger), and that’s one of the easiest ways to hit a plateau. (And this applies to every major muscle group in the body, not just your chest.)
When I started doing the opposite–more compound exercises than isolation, and more heavy training and emphasis on progressive overload over pump–I started seeing real changes in my chest (and entire physique) for the first time in a long time.
This brings me to one of the biggest lessons I’ve learned about weightlifting and building muscle naturally:
If you want to build muscle consistently and effectively, you want to focus on heavy (80 to 85% of your one-rep max) compound weightlifting.
In terms of chest workouts, that means your bread and butter is heavy barbell and dumbbell pressing, and your dessert is supplementary work like dips and flyes.
“But wait a minute,” you might be thinking. “[SHREDDED FITNESS MODEL] does fifteen different exercises and a billion reps in his chest workouts and he has amazing pecs… What gives?”
Well first, genetics and training history factor in heavily here, but then there’s the #dedication. All 2 grams of it that he injects every week.
I know that sounds cynical, but it’s true. Steroids change everything.
With the right drugs, you can sit in the gym for a few hours every day doing set after set, exercise after exercise, and your muscles will just get bigger and bigger.
(A bit of an overstatement, I know, but it’s more accurate than inaccurate.)
You’ve probably also noticed that (open or obvious) steroid users have abnormally large shoulders, traps, and pecs (and upper chests in particular).
This is because those areas of the body have large amounts of androgen receptors, which are proteins in cells that respond to various hormones (including anabolic hormones like testosterone that make muscles grow).
Thus, when large amounts of anabolic hormones are introduced into the body, the shoulders, traps, and pecs grow very quickly and can reach freaky levels of size.
Don’t be discouraged, though.
You can build a great chest–and a great body–drug-free with a bit of know-how, hard work, and patience.
And as far as chest training goes, here’s what it boils down to:
Focus on lifting heavy weights in your chest workouts.
And by “heavy,” I mean working primarily in the 4 to 6/5 to 7 rep range.
Focus on the chest exercises that safely allow for progressive overload.
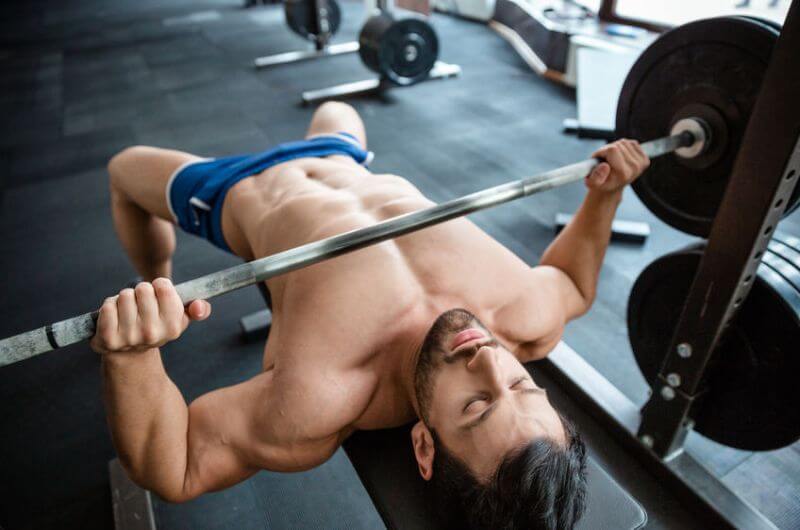
Here’s a simple maxim of natural weightlifting:
If you stop getting stronger, you’ll eventually stop getting bigger.
Regardless of all the variables that go into programming workouts, you can take that to the bank.
The number one rule of natural muscle building is progressive overload, which refers to progressively increasing tension levels in the muscle over time.
And the most effective way to do this is adding weight to the bar.
Certain exercises don’t lend themselves well to both heavy lifting and progressive overload, though. For example, heavy dumbbell flys increase the risk of injuring your rotator cuff muscles whereas the bench press allows you to keep your shoulders protected.
Another element of your chest workouts that you have to get right is weekly volume (the total amount of reps you do each week) for each muscle group you train.
If you do too little, you’ll gain less muscle than you should or could. If you do too much, you won’t be able to fully recover from your workouts and, in time, you’ll gain less muscle than you should or could.
Finding the “sweet spot” for volume can be tricky, and especially when you’re doing a lot of heavy weightlifting because the heavier the weights, the the lower the volume must be to avoid symptoms related to overtraining.
The reason for this is obvious: heavier weights put more strain on the body and, well, the body can only take so much before it falls behind in recovery.
I’ve tried many different workout splits and frequency schemes and what I’ve found works best is in line two extensive reviews on the subject.
Optimal training volume appears to be in the range of 60 to 180 reps per major muscle group per per week when weights are in the range of 60 to 80% of one-rep max (1RM).
The lower end of that rep range applies to heavier weights and the higher end to lighter training.
So, for example, if the majority of your sets were in the range of 80 to 85% of 1RM (as with my Bigger Leaner Stronger program), you’d want to be around 60 to 80 total reps per major muscle group per week.
If you were using much lighter weights, though, you’d want your weekly volume for each major muscle group to approach the top end of about 180 reps.
And if you were doing something in the middle, like my Thinner Leaner Stronger program for women, which has you lifting moderately heavy weights (70 to 75% of 1RM), you’d want your total weekly reps per major muscle group to be somewhere in the middle as well.
How to Get a Bigger Chest in 30 Days
The Diet
You probably know that exercise alone isn’t enough to gain muscle and lose fat.
Ultimately, your success or failure is going to be decided by your diet.
Think of it like this:
If your body were a car, exercise is the gas pedal and diet is the fuel in the tank.
You have to step on the gas (exercise) to get moving (improve your body composition)…
…but how far will you get without enough of the right fuel?
My point is this:
If you know how to manage your fuel (diet) properly, building muscle and burning fat will be easy and straightforward.
If you don’t, it will be ridiculously difficult …if not impossible.
That’s why it’s not enough to just give you a 30-day workout routine. We need to set your diet up properly as well.
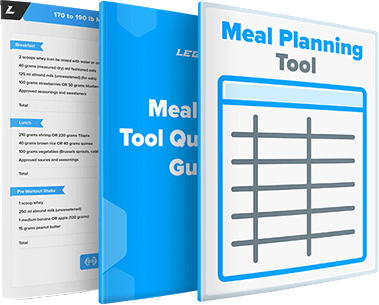
I break it all down in my in-depth guide to meal planning, which I highly recommend you read and implement in conjunction with the workouts.
If you don’t, you simply won’t get as much out of them as you should.
How to Get a Bigger Chest in 30 Days
The Exercises
Browse the Internet for people’s opinions on the best chest exercises and you’ll quickly be overwhelmed.
I have good news, though:
Out of the hundreds you can choose from, very few are actually necessary for achieving your goals. Here they are:
- Barbell Bench Press
- Incline Press
- Close-Grip Press
- Reverse-Grip Press
- Dumbbell Bench Press
- Flat Press
- Incline Press
- Dip
If you’re relatively new to weightlifting, these exercises are all you need. Forget cable work, dumbbell flys and pullovers, push-up variations, machines, and every other type of chest exercise out there.
As you gain more experience in the weight room, though, including other exercises into your chest workouts can help you squeeze every ounce of growth out of your pecs (which is why the workouts in this article include a couple “supplementary” exercises).
The bottom line, though, is these supplementary exercises aren’t nearly as effective and important as the core, foundation-building lifts I listed above.
So, let’s take a closer look at how to do each of the chest exercises you’ll be doing in this 30-day chest routine.
Flat Barbell Bench Press
There’s a reason why every well-designed weightlifting program focused on the bench press for upper body development:
It’s one of the best all-around upper body exercises you can do, training the pectorals, lats, shoulders, triceps, and even the legs to a slight degree.
That said, although it looks simple enough, the bench press is a fairly technical movement, which is why learning proper form is crucial.
And the first place to start with bench press form is…
Should You Bench On the Smith Machine?
No, you shouldn’t.
I don’t recommend that you bench on the Smith Machine because research shows it produces smaller gains in muscle and strength than the free weight bench press.
One of the major reasons for this is the Smith Machine has a fixed, level bar that moves on a fixed, vertical movement path. The free weight bar, on the other hand, must be stabilized by you to stay level and prevent horizontal swaying.
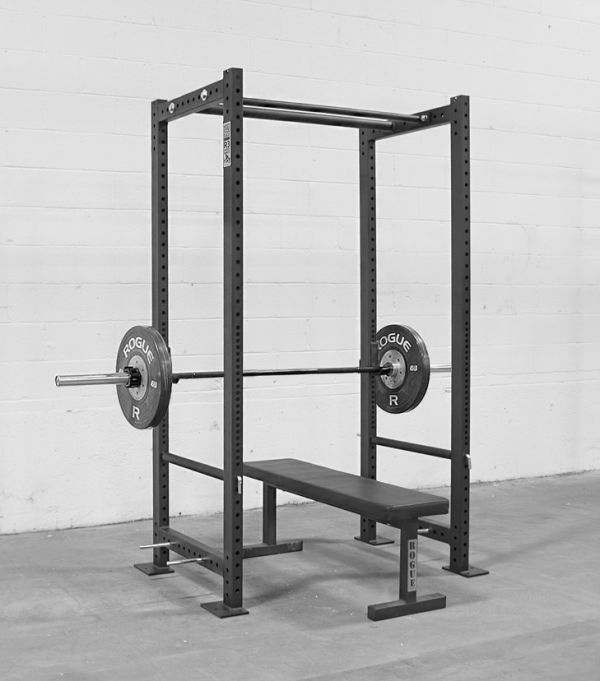
If you like the Smith Machine for its safety, you can have the best of both worlds by bench in a Power Rack instead.
A standard free weight bench press station is fine if you have a spotter, but if you don’t, you’re probably not going to be able to push yourself as hard as you want for fear of dropping the bar on your face.
Even if you have a lot of weightlifting experience and a good feel for your body and when your muscles are going to fail, there are going to be times where you either could have squeezed out another rep but didn’t go for it or where you do go for it and get stuck.
Enter the Power Rack.
Here’s a fantastic one made by Rogue, which I highly recommend:
The safety arms are what make the Power Rack so useful. If you set them at the right height, they’ll catch the weight when you fail.
Here’s how to do it:
Your bench and barbell matter too.
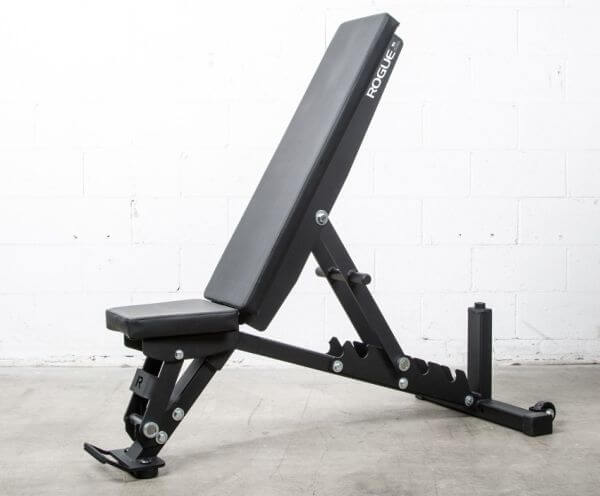
You want to make sure your bench is large enough to support your entire upper back and remain stable while you press (12″ wide is a good rule of thumb).
Again, I highly recommend Rogue’s bench:
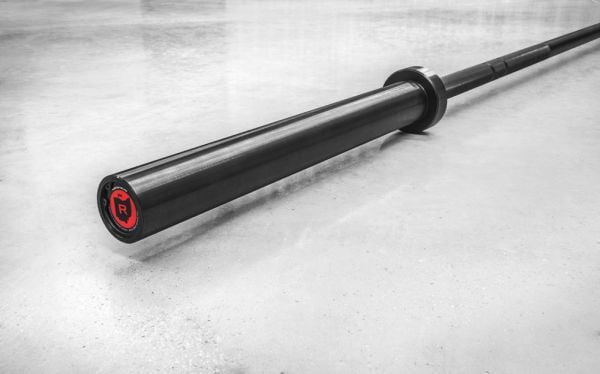
And while you might think a barbell is a barbell, but I recommend you pony up for a high-quality one with sleeves that can spin independently of the bar.
That is, the plates should be able to rotate without torquing the bar, which can put a lot of strain on your wrists.
I like Rogue’s Ohio Bar:
Alright, now that we have the equipment checked off, let’s learn how to bench press, starting with the setup.
How to Set Up Correctly for the Bench Press
There are five simple steps to setting up correctly on the bench press.
1. Lie down on the bench and adjust so your eyes are under the bar.
Simlpe enough.
2. Raise your chest up and tuck your shoulder blades down and squeeze them together.
You should feel tightness in your upper back, and you want to maintain this position throughout the entire lift.
3. Grab the bar with your hands slightly wider than shoulder-width apart.
Hold the bar low in your hands, closer to your wrists than your fingers, and squeeze it as hard as you can.
Your wrists should be straight up and down, not cupped (bent toward your head). This prevents wrist pain.

A good way to check your grip width is to have a friend get behind you (looking at the top of your head) and check the position of your forearms at the bottom of the movement.
You want your forearms to be as close to perpendicular to the ground as possible. That is, straight up-and-down vertical, like this:

As you can see, the position on the far left is too wide, the middle is too narrow, and the far right is correct.
4. Slightly arch your lower back and plant your feet on the ground, directly under your knees, shoulder-width apart.
You don’t want your back flat on the bench and you don’t want it so arched that your butt is floating above it.
Instead, you want to maintain the natural arch that occurs when you push your chest out.
5. Unrack the weight by straightening your arms and then moving it horizontally until it’s directly over your shoulders.
You’re now ready to press.
6. Set up the same way every time you bench press, whether you’re just warming up or going for a PR.
It’s a good technique-building habit that will pay off in consistently better lifts and a lower risk of injury.
How to Descend Correctly
The first thing you need to know about pressing is how to tuck your elbows properly.
Many people make the mistake of flaring them out (away from the body), which can chew up your shoulders. This mistake alone is the main reason why the bench press has a bad reputation as a shoulder injury waiting to happen.
A less common mistake is tucking your elbows too close to your torso, which robs you of stability and strength.
Instead, you want your elbows at a 50- to 60-degree angle relative to your torso. This protects your shoulders and is a stable, strong position to press from. Here’s a helpful visual:
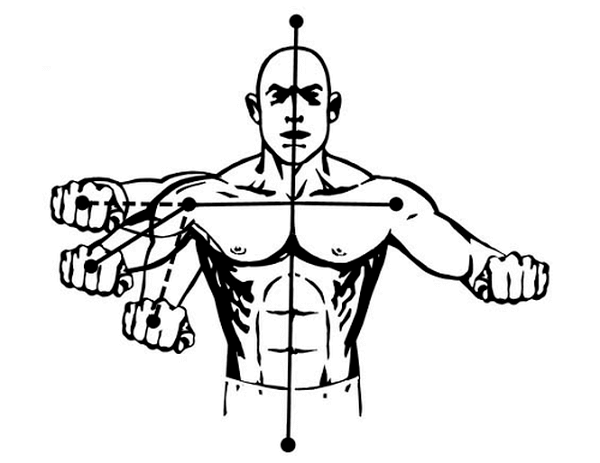
In the bottommost position, the arms are at about a 20-degree angle relative to the torso, which is too close. The middle position is the ideal one–about 60 degrees–and the topmost is the common mistake of 90 degrees.
It’s worth noting that some people find pressing more comfortable with their elbows slightly closer to their torsos than the 60-degree position. That’s fine. Find what’s most comfortable for you, but don’t go beyond 60 degrees.
So, now that you know the proper position of the elbows, let’s get back to the movement itself.
Keeping your elbows tucked and in place, lower the bar to the lower part of the middle of your chest, around your nipples.
Yes, the bar should touch your chest–no half-repping!
You should lower the bar in a controlled manner but shouldn’t be deliberately slow about it. (Super-slow reps aren’t better for building muscle.) About 2 seconds down is correct.
How to Ascend Correctly
Once the bar has touched your chest (touched, not crashed into and rebounded off), you’re ready to push the bar up.
Although it’s called the bench press, it’s better to think of the ascension as pushing rather than pressing.
That is, picture that you’re pushing your torso away from the bar and into the bench instead of pressing the bar away from your torso. This will help you maintain proper form and maximize power.
The bar should move up with a slightly diagonal path, moving toward your shoulders, ending where you began: with the bar directly over your shoulders, where it’s most naturally balanced.
Lock your elbows out at the top–don’t keep them slightly bent lest you drop the bar on your face.
When ascending, nothing changes with anything else you’ve learned thus far about body position. Your shoulder blades remain down and pinched, your elbows tucked, your lower back slightly arched, your butt on the bench, and your feet on the floor.
How to Rack the Bar Correctly
Don’t try to press the bar directly into the hooks because if you miss, it’s coming down on your face.
Instead, finish your rep with the bar directly over your shoulders and your elbows locked and then shift the bar horizontally into the uprights.
Putting It All Together
The Ideal Bench Press Form
Alright, that’s quite a bit to visualize so a good video is in order. Here’s what it all looks like in action:
Incline Barbell Bench Press
The flat barbell bench press is a staple in many weightlifting programs but is usually accompanied by several variations.
The incline bench press is one of the best of these variations because it helps build the upper portion of the chest more than flat or decline pressing does.
It’s fundamentally the same as the flat press, but there are a few points of note:
When doing this exercise, the angle of incline in the bench should be 30 to 45 degrees.
I prefer 30 degrees, but some people prefer an incline closer to 45. I recommend that you try various settings ranging between 30 and 45 degrees and see which you like most.
The bar should pass by the chin and touch just below the collarbones to allow for a vertical bar path.
Here’s a video that shows proper form with the barbell:
Dumbbell Bench Press (Flat and Incline)
While it’s not a direct replacement for the barbell bench press, the dumbbell bench press is a valuable chest builder.
One of the things I like about it is it allows you to increase the range of motion beyond the barbell press. Here’s how I like to do it (this is incline, of course, but you get the idea):
Technically my butt shouldn’t be moving–I was trying to move up in weight here and got a little overzealous–but what I wanted to show you was how I rotate my hands at the bottom of the rep and bring the dumbbells low.
This increases the range of motion without increasing the risk of injury, and I’ve found this very helpful in progressing with the weight and developing my chest.
Close-Grip Bench Press
When bench pressing, the narrower your grip on the bar, the more work your triceps have to do.
This is undesirable when you’re focusing on training your chest, but it’s one of my favorite ways to train the triceps. And, incidentally, stronger triceps means a stronger (regular) bench press.
It’s important to know that when doing a close-grip bench press, your grip should be slightly narrower than shoulder-width and no closer.
Closer than that puts the shoulders and wrists in a weakened, compromised position.
The rest of the setup and movement are the same as the regular bench press: the shoulder blades are “screwed” into the bench, there’s a slight arch in the lower back, the feet are flat on the floor, and the bar moves down on a slightly diagonal path, touches the bottom of the chest, and then back up.
If your shoulders or wrists feel uncomfortable at the bottom of the lift, simply widen your grip by about the width of a finger and try again.
If it’s still uncomfortable, widen your grip by another finger width and repeat until it’s comfortable.
Here’s a good instructional video:
Reverse-Grip Bench Press
The reverse-grip bench press is an often-overlooked variation of the bench press that has merit.
It involves flipping your grip around on the bar (so your palms face you) and it’s easier on your shoulders than the traditional bench press and is particularly effective for targeting the upper chest as well.
Here’s how to do it:
Dip
The dip is one of the best bodyweight exercises you can do for your upper body.
It trains your chest, shoulders, and triceps, and can be loaded with a dip belt to increase the difficulty.
Here’s how to do it:
Dumbbell Overhead Triceps Press
This is one of my favorite triceps exercises.
It’s particularly good for targeting the long head of the triceps and allows you to safely press heavy weight and overload the muscles.
This video shows proper form:
Low Cable Chest Fly
The chest fly isn’t as great of a chest exercise as many people believe, but it’s ones of the better isolation exercises that you can incorporate into your chest workouts.
I particularly like it because the low pulley position minimizes the stress put on the shoulder joints.
Dumbbell Cuban Press
The Cuban Press is a little-known exercise that’s great for training the rear delts and rotator cuff muscles.
Strengthening these muscles does wonders for stabilizing your shoulders and preventing dysfunction or injury in your pressing.
Here’s how to do it:
Remember–Progression is the Key to Muscle Growth
That’s it for the exercises you’ll be doing.
The key, however, isn’t just doing the exercises–it’s progressing on them. That is, increasing the amount of weight you can move over time.
Remember: If you don’t get stronger, you won’t get bigger.
But if you do gain strength on these exercises and eat enough food to grow, your chest will respond.
How to Get a Bigger Chest in 30 Days
The Workouts
We’ve covered a lot so far—the ideal approach to chest building, the physiology of muscle growth, how to eat right, and the best chest exercises for gaining size and strength.
It’s now time to hit the gym and make some chest gains!
Step one is outlining our goal for the next 30 days, and that’s focusing the majority of our time and energy on maximizing chest growth.
As you’ll see, we’re not going to neglect the rest of the body, but we’re going to dial everything else back (reducing both intensity and volume) so we can really hammer our chest for a month.
That’s why this is a 30-day program, by the way—it’s not a balanced whole-body routine that you should do for an extended period of time.
It’s a tool you can use periodically to “shock” your chest into growing and, once that has been accomplished, that should be returned to the toolbox.
So, here’s the workout plan:
Day 1
Press A
Incline Barbell Bench Press
Warm up and 3 sets of 4 to 6 reps
Incline Dumbbell Bench Press
3 sets of 4 to 6 reps
Seated or Standing Military Press
3 sets of 8 to 10 reps
Day 2
Pull
Deadlift
Warm up and 3 sets of 4 to 6 reps
One-Arm Dumbbell Row
3 sets of 8 to 10 reps
Wide-Grip Lat Pulldown
3 sets of 8 to 10 reps
(Not sure how to do these exercises? Check out this article.)
Day 3
Rest
Day 4
Press B
Flat Barbell Bench Press
Warm up and 3 sets of 4 to 6 reps
Flat Dumbbell Bench Press
3 sets of 8 to 10 reps
Dip
3 sets of 8 to 10 reps
Day 5
Legs
Barbell Back Squat
Warm up and 3 sets of 4 to 6 reps
Barbell Lunge
3 sets of 8 to 10 reps
Lying Hamstring Curl
3 sets of 8 to 10 reps
(Not sure how to do these exercises? Check out this article.)
Day 6
Press C
Reverse-Grip Bench Press
Warm up and 3 sets of 4 to 6 reps
Low Cable Chest Fly
3 sets of 8 to 10 reps
Dumbbell Cuban Press
3 sets of 10 to 12 reps
Day 7
Rest
Take measurements, do four weeks of those workouts, and measure again. I promise you that your chest will be bigger.
(I also recommend that you take a week to deload before resuming your normal training as your body will probably need a break.)
A few points to keep in mind while you’re doing these workouts…
Rest 3 minutes in between your 4-to-6-rep sets and 2 minutes in between your 8-to-10-rep sets.
This will give your muscles enough time to fully recoup their strength so you can give maximum effort each set.
You don’t have to push to absolute muscle failure every set, but you need to come close.
The subject of whether to train to failure (the point at which you can no longer keep the weight moving and have to end the set) or not is a contentious one.
Experts disagree left and right, legit-sounding scientific arguments can be made for a variety of positions, and many people report success with many different approaches.
Well, I break it all down in this article, but here’s the long story short:
We should be training to failure, but not so much that we risk injury or overtrain.
Exactly how much that amounts to will vary from person to person.
Personally, I never train to failure for more than 2 to 3 sets per workout, and never on the squat, deadlift, bench press, or military press as this can be dangerous.
Furthermore, I don’t recommend you train to failure when you’re using very heavy loads (1 to 4 rep range).
Instead, the majority of your sets should be taken to the rep preceding failure (the last rep you can perform without assistance).
If you’re new to weightlifting, finding this point will be tricky, but as you get used to your body and your lifts, you’ll get a feel for it.
Once you hit the top of your rep range for one set, you move up in weight.
For instance, if you get on the incline bench and push out 6 reps on your first set, you add 5 pounds to each side of the bar for your next set and work with that weight until you can press it for 6 reps, and so forth.
What About Supplements?

I saved this for last because, quite frankly, it’s far less important than proper diet and training.
You see, supplements don’t build great physiques–dedication to proper training and nutrition does.
Unfortunately, the workout supplement industry is plagued by pseudoscience, ridiculous hype, misleading advertising and endorsements, products full of junk ingredients, underdosing key ingredients, and many other shenanigans.
Most supplement companies produce cheap, junk products and try to dazzle you with ridiculous marketing claims, high-profile (and very expensive) endorsements, pseudo-scientific babble, fancy-sounding proprietary blends, and flashy packaging.
So, while workout supplements don’t play a vital role in building muscle and losing fat, and many are a complete waste of money…the right ones can help.
The truth of the matter is there are safe, natural substances that have been scientifically proven to deliver benefits such as increased strength, muscle endurance and growth, fat loss, and more.
As a part of my work, it’s been my job to know what these substances are, and find products with them that I can use myself and recommend to others.
Finding high-quality, effective, and fairly priced products has always been a struggle, though.
That’s why I took matters into my own hands and decided to create my own supplements. And not just another line of “me too” supplements–the exact formulations I myself have always wanted and wished others would create.
I won’t go into a whole spiel here, but if you want to learn more about my supplement line, check this out. (And if you’d like to know exactly what supplements to take to reach your fitness goals, take the Legion Supplement Finder Quiz.)
For the purpose of this article, let’s just quickly review the supplements that are going to help you get the most out of your chest (and other) workouts.
Creatine
Creatine is a substance found naturally in the body and in foods like red meat. It’s perhaps the most researched molecule in the world of sport supplements–the subject of hundreds of studies–and the consensus is very clear:
Supplementation with creatine helps…
You may have heard that creatine is bad for your kidneys, but these claims have been categorically and repeatedly disproven. In healthy subjects, creatine has been shown to have no harmful side effects, in both short- or long-term usage. People with kidney disease are not advised to supplement with creatine, however.
If you have healthy kidneys, I highly recommend that you supplement with creatine. It’s safe, cheap, and effective.
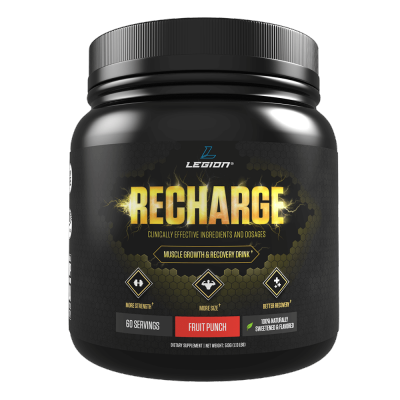
In terms of specific products, I use my own, of course, which is called RECHARGE.
RECHARGE is 100% naturally sweetened and flavored and each serving contains:
- 5 grams of creatine monohydrate
- 2100 milligrams of L-carnitine L-tartrate
- 10.8 milligrams of corosolic acid
This gives you the proven strength, size, and recovery benefits of creatine monohydrate plus the muscle repair and insulin sensitivity benefits of L-carnitine L-tartrate and corosolic acid.
Protein Powder
You don’t need protein supplements to gain muscle, but, considering how much protein you need to eat every day to maximize muscle growth, getting all your protein from whole food can be impractical.
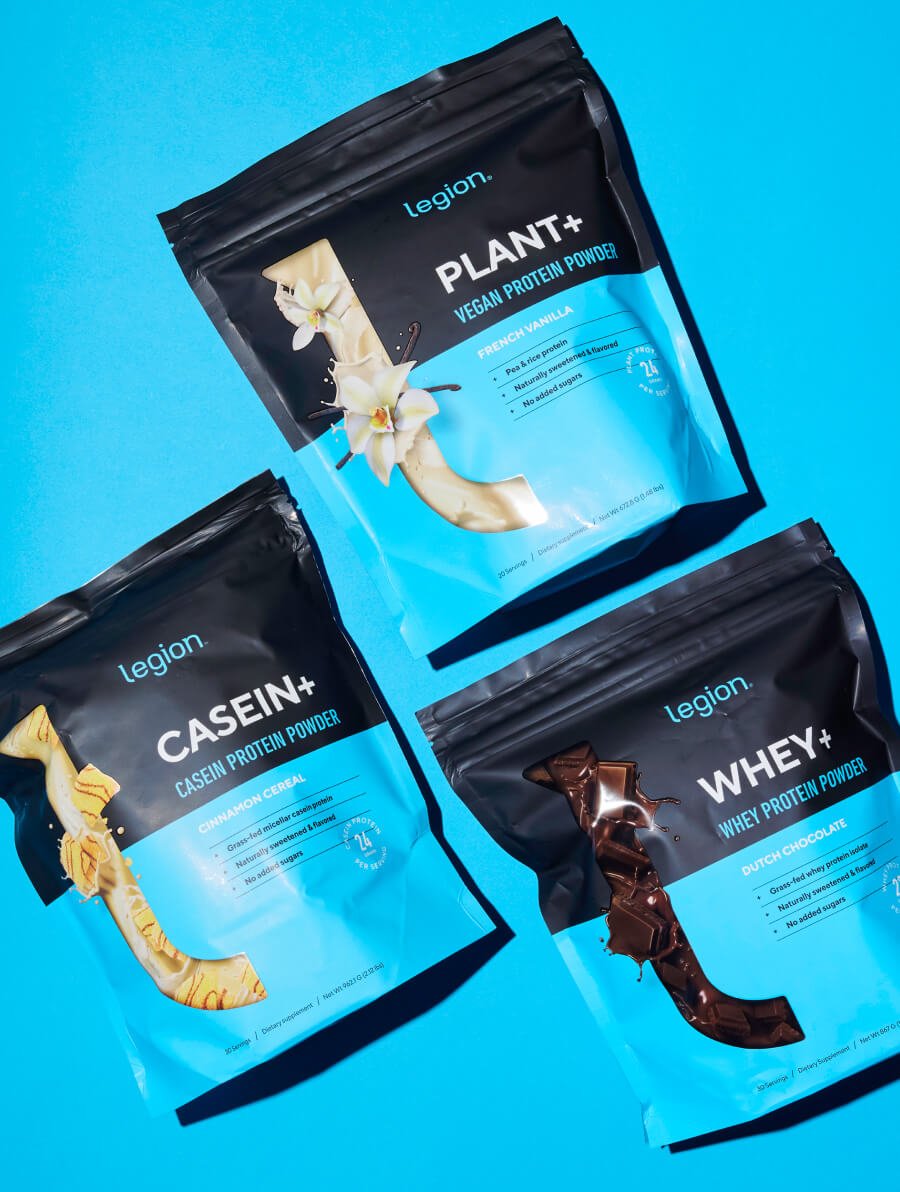
That’s the main reason I created (and use) a whey protein supplement. (There’s also evidence that whey protein is particularly good for your post-workout nutrition.)
WHEY+ is 100% naturally sweetened and flavored whey isolate that is made from milk sourced from small dairy farms in Ireland, which are known for their exceptionally high-quality dairy.
I can confidently say that this is the creamiest, tastiest, healthiest all-natural whey protein powder you can find.

Pre-Workout Drink
There’s no question that a pre-workout supplement can get you fired up to get to work in the gym. There are downsides and potential risks, however.
Many pre-workout drinks are stuffed full of ineffective ingredients and/or minuscule dosages of otherwise good ingredients, making them little more than a few cheap stimulants with some “pixie dust” sprinkled in to make for a pretty label and convincing ad copy.
Many others don’t even have stimulants going for them and are just complete duds.
Others still are downright dangerous, like USPLabs’ popular pre-workout “Jack3d,”which contained a powerful (and now banned) stimulant known as DMAA.
Even worse was the popular pre-workout supplement “Craze,” which contained a chemical similar to methamphetamine.
The reality is it’s very hard to find a pre-workout supplement that’s light on stimulants but heavy on natural, safe, performance-enhancing ingredients like beta-alanine, betaine, and citrulline.
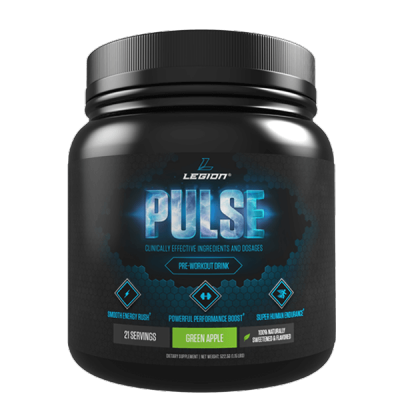
And that’s why I made my own pre-workout supplement. It’s called PULSE and it contains 6 of the most effective performance-enhancing ingredients available:
- Caffeine. Caffeine is good for more than the energy boost. It also increases muscle endurance and strength.
- Beta-Alanine. Beta-alanine is a naturally occurring amino acid that reduces exercise-induced fatigue, improves anaerobic exercise capacity, and can accelerate muscle growth.
- Citrulline Malate. Citrulline is an amino acid that improves muscle endurance, relieves muscle soreness, and improves aerobic performance.
- Betaine. Betaine is a compound found in plants like beets that improves muscle endurance, increases strength, and increases human growth hormone and insulin-like growth factor 1 production in response to acute exercise.
- Ornithine. Ornithine is an amino acid found in high amounts in dairy and meat that reduces fatigue in prolonged exercise and promotes lipid oxidation (the burning of fat for energy as opposed to carbohydrate or glycogen).
- Theanine. Theanine is an amino acid found primarily in tea that reduces the effects of mental and physical stress, increases the production of nitric oxide, which improves blood flow, and improves alertness, focus, attention, memory, mental task performance, and mood.
And what you won’t find in PULSE is equally special:
- No artificial sweeteners or flavors..
- No artificial food dyes.
- No unnecessary fillers, carbohydrate powders, or junk ingredients.
The bottom line is if you want to know what a pre-workout is supposed to feel like…if you want to experience the type of energy rush and performance boost that only clinically effective dosages of scientifically validated ingredients can deliver…then you want to try PULSE.
Again, if you feel confused about what supplements you should take to reach your goals, take the Legion Supplement Finder Quiz to learn exactly what supplements are right for you. It’s the best way to ensure you get the most out of your supplement regimen.
The Bottom Line on Getting a Bigger Chest
As you can see, building a bigger chest is pretty straightforward.
You hit it with a lot of heavy lifting. You do the right exercises. You eat enough food, sleep enough, and, if you want an easy boost, take the right supplements. And your body takes care of the rest.
Happy training!
Want More Workouts?
How to Get Bigger and Stronger Shoulders in Just 30 Days
How to Get a Bigger and Rounder Butt in Just 30 Days
How to Get Bigger and Stronger Biceps in Just 30 Days
How to Get Bigger and Stronger Triceps in Just 30 Days
How to Get Bigger and Stronger Legs in Just 30 Days
How to Get a Bigger and Stronger Back in Just 30 Days
What’s your take on getting a bigger chest? Have anything else to share? Let me know in the comments below!
Scientific References +
- Lehman, G. J. (2005). The influence of grip width and forearm pronation/supination on upper-body myoelectric activity during the flat bench press. Journal of Strength and Conditioning Research, 19(3), 587–591. https://doi.org/10.1519/R-15024.1
- Saeterbakken, A. H., van den Tillaar, Ro., & Fimland, M. S. (2011). A comparison of muscle activity and 1-RM strength of three chest-press exercises with different stability requirements. Journal of Sports Sciences, 29(5), 533–538. https://doi.org/10.1080/02640414.2010.543916
- Schick, E. E., Coburn, J. W., Brown, L. E., Judelson, D. A., Khamoui, A. V., Tran, T. T., & Uribe, B. P. (2010). A comparison of muscle activation between a Smith machine and free weight bench press. Journal of Strength and Conditioning Research, 24(3), 779–784. https://doi.org/10.1519/JSC.0b013e3181cc2237
- Peterson, M. D., Rhea, M. R., & Alvar, B. A. (2005). Applications of the dose-response for muscular strength development: A review of meta-analytic efficacy and reliability for designing training prescription. Journal of Strength and Conditioning Research, 19(4), 950–958. https://doi.org/10.1519/R-16874.1
- Wernbom, M., Augustsson, J., & Thomeé, R. (2007). The influence of frequency, intensity, volume and mode of strength training on whole muscle cross-sectional area in humans. In Sports Medicine (Vol. 37, Issue 3, pp. 225–264). Sports Med. https://doi.org/10.2165/00007256-200737030-00004
- Kadi, F., Bonnerud, P., Eriksson, A., & Thornell, L. E. (2000). The expression of androgen receptors in human neck and limb muscles: Effects of training and self-administration of androgenic-anabolic steroids. Histochemistry and Cell Biology, 113(1), 25–29. https://doi.org/10.1007/s004180050003
- Trebs, A. A., Brandenburg, J. P., & Pitney, W. A. (2010). An electromyography analysis of 3 muscles surrounding the shoulder joint during the performance of a chest press exercise at several angles. Journal of Strength and Conditioning Research, 24(7), 1925–1930. https://doi.org/10.1519/JSC.0b013e3181ddfae7
